
Transforming kitchen cabinets can seem daunting, but with the right approach, anyone can achieve professional results. A well-planned process involving proper preparation, quality materials, and techniques can lead to stunning cabinet finishes that enhance the entire kitchen’s appearance.
Understanding the essential tools and steps is critical to avoid common pitfalls that could derail the project. From selecting the right paint to mastering application techniques, attention to detail will yield impressive outcomes. This article will guide readers through each step, ensuring they are well-equipped for success.
By the end of this post, readers will be empowered with the knowledge to paint their kitchen cabinets effectively, turning their vision into reality. With the right information, even a novice can make their cabinets look brand new.
Essential Preparation for Painting Kitchen Cabinets
Preparation is crucial for achieving a professional finish when painting kitchen cabinets. The steps include thorough cleaning, removing cabinet components, and deciding on the right surface preparation method.
Cleaning and Degreasing Kitchen Cabinets
Before any painting begins, kitchens require a deep clean. This surface needs to be free of dust, grease, and grime. A degreaser specifically designed for kitchen use is ideal for this task.
- Apply the Degreaser: Use a sponge or cloth to apply the degreaser on the cabinet surfaces. Ensure coverage on frequently touched areas.
- Scrub Thoroughly: For stubborn spots, a nylon scrub pad can help lift built-up grease without scratching the surface.
- Rinse and Dry: After scrubbing, wipe the cabinets with a clean, damp cloth to remove any residue. Allow them to dry completely before proceeding.
Cleaning ensures better adhesion of paint, which is crucial for durability.
Removing Cabinet Doors and Hardware
Removing cabinet doors and hardware streamlines the painting process. It allows for more even coverage and access to all surfaces.
- Gather Tools: A screwdriver set will be needed to remove hinges and knobs effectively.
- Label Everything: As doors and hardware come off, labeling them helps keep track of each piece, simplifying reinstallation.
- Store Safely: Place removed items in a labeled container to avoid misplacing any components.
Detached doors can be laid flat for painting, reducing the chances of drips and ensuring even coverage.
Surface Prep: Sanding vs. Deglossing
Selecting the correct surface preparation method impacts the final paint finish. Two commonly used methods are sanding and deglossing.
Sanding: This method provides a rougher surface, allowing paint to adhere better. Use fine-grit sandpaper for smoothing glossy finishes.
- Key Tips: Sand lightly to prevent deep scratches, and always clean away dust afterward.
Deglossing: A deglosser is an alternative that simplifies the process. It softens the shine without creating dust.
- Applications: Apply deglosser using a cloth and let it sit as per the instructions before wiping off excess.
Choosing between sanding and deglossing depends on the cabinet’s previous finish and the preferred painting technique.
Priming and Repairing Cabinets
Proper priming and repairing are essential steps in achieving a professional finish for kitchen cabinets. This process ensures that surfaces are smooth and ready for paint, which can enhance durability and appearance.
Selecting the Right Primer for Cabinets
Choosing the correct primer is crucial for kitchen cabinets. Oil-based primers offer excellent adhesion and durability, making them ideal for high-traffic areas. Water-based primers dry quickly and are easier to clean, which makes them convenient for most DIY projects.
Consider stain-blocking primers if cabinets have previous stains or odors. Always check for compatibility with the existing surface and the paint being used. A high-quality primer can significantly contribute to the longevity of the finish, ensuring it withstands daily use.
Repairing and Filling Imperfections
Before priming, it’s vital to address any imperfections in the cabinet surfaces. Wood filler is effective for filling dents, scratches, and holes. Ensure the filler matches the cabinet material for a seamless finish.
Once applied, sand the filler smooth using fine-grit sandpaper. This creates a flat surface that allows primer to adhere properly. For deeper gouges, apply filler in layers, allowing each layer to dry completely. Thorough repairs can save time in the painting process by reducing the need for multiple coats.
Applying Primer for Maximum Adhesion
The application of primer should be done carefully for optimum results. Start by shaking or stirring the liquid to ensure a consistent texture. Using a high-quality brush or roller, apply a thin coat of primer, making sure to get into corners and crevices.
After the first coat dries, lightly sand the surface to encourage better adhesion of subsequent layers. This step is crucial in achieving a smooth finish. Follow the manufacturer’s instructions regarding drying times before applying the paint. By prioritizing a thorough priming process, the durability and aesthetic of the cabinets will be significantly enhanced.
Achieving a Professional Cabinet Paint Finish
A professional cabinet paint finish requires careful selection of materials and techniques. Attention to detail at every step ensures a durable and visually appealing result.
Choosing the Best Paint and Finish Type
Selecting the right paint is crucial. Cabinet paint is specifically formulated for durability and easy cleaning. Latex paint is often preferred due to its low VOC content and quick drying time. If opting for an all-in-one paint, check its viscosity. A smoother application is generally achieved with a satin finish, offering a soft sheen that is more forgiving than high-gloss options.
When selecting a color, pure white remains a classic choice, ideal for creating a bright, airy kitchen. It’s helpful to purchase sample sizes of different shades to test in the space, as lighting can greatly influence appearance.
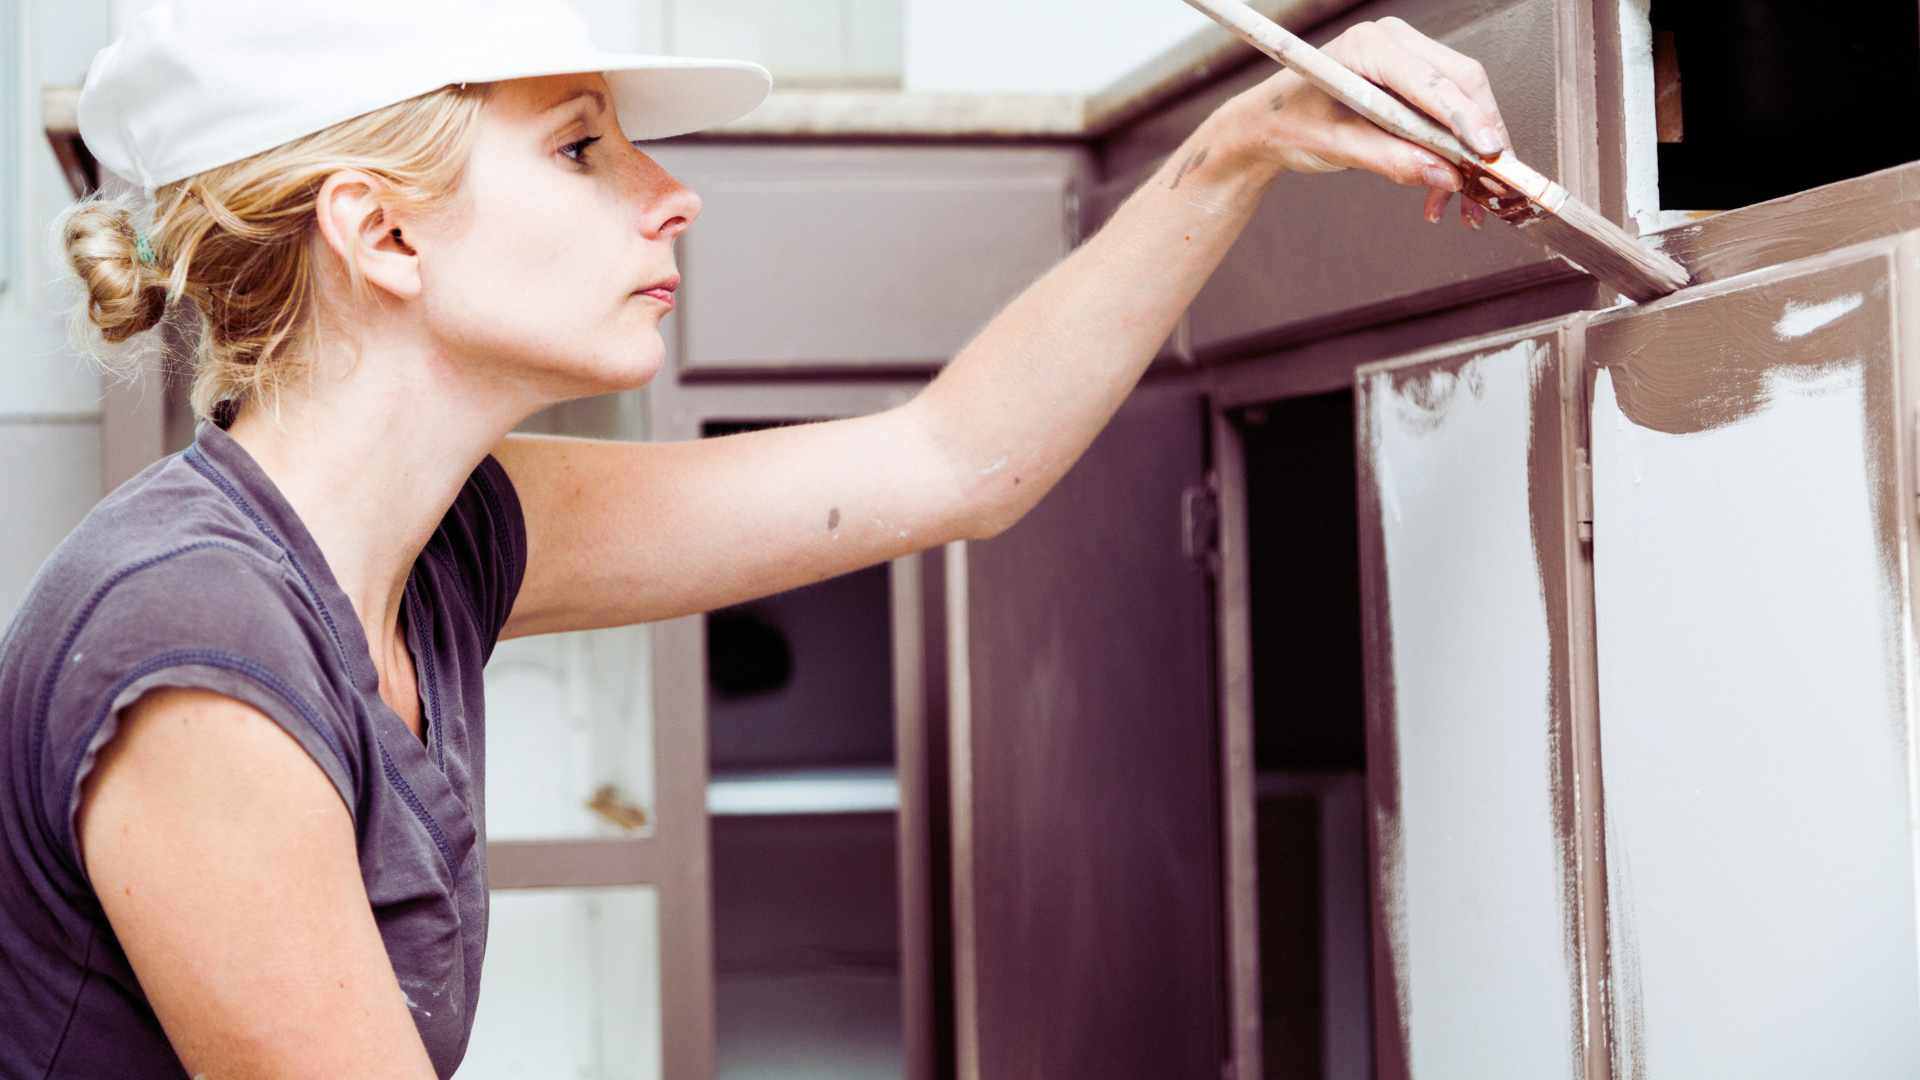
Using Sprayers, Brushes, and Rollers
For a flawless finish, the application method significantly impacts the outcome. Paint sprayers provide a smooth coat and can reach intricate details, making them ideal for cabinets. Control the nozzle angle and distance to optimize coverage.
Brushes are effective for corners and edges, ensuring paint doesn’t puddle. A high-quality synthetic or foam brush minimizes brush strokes. Rollers can also be utilized for larger flat surfaces, but it’s essential to use a fine nap to avoid an uneven texture.
Experiment with a combination of these tools to determine the best fit for specific cabinet styles.
Painting Techniques for a Flawless Finish
Preparation is key to achieving a professional look. Start by thoroughly cleaning and sanding cabinets to create a smooth surface. Afterward, apply a coat of primer, particularly if changing from dark to light colors or dealing with stained wood.
When painting, use long, even strokes. For spray painting, maintain a consistent distance from the surface, typically around 10-12 inches. Apply multiple thin coats rather than one thick layer, allowing each coat to dry before applying the next. This method reduces drips and ensures an even finish.
Using a product like Floetrol can improve flow and leveling when using latex paint, enhancing the final appearance.
Managing Drying and Curing Times
Drying time varies based on paint type, humidity, and temperature. Typically, latex paint dries within an hour to the touch but may require up to two hours for recoating. Curing, however, can take days. It’s important to allow cabinets to cure fully before heavy use.
Plan for adequate ventilation during the drying process. To ensure the paint sets properly, keep the cabinets in a controlled environment, away from dust and moisture.
Awareness of these factors can significantly enhance the overall quality and longevity of the paint finish on kitchen cabinets.
Final Touches and Ensuring Durability
The final steps in painting kitchen cabinets focus on protective measures and proper installation. Taking the time to apply a quality topcoat and reattach cabinet hardware correctly enhances both aesthetics and longevity. Regular maintenance also plays a crucial role in preserving the kitchen makeover.
Applying a Protective Topcoat
A protective topcoat is essential for achieving a professional finish and improving durability. Water-based polyurethane is commonly used for cabinets due to its quick drying time and non-yellowing properties.
- Application: Use a high-quality synthetic brush or a foam applicator to avoid brush marks.
- Coats: Apply at least two thin coats of topcoat, allowing proper drying time between applications.
- Sanding: Lightly sand with fine-grit sandpaper between coats to ensure adhesion and a smooth finish.
This layer shields paint from scratches, moisture, and wear, extending the life of the cabinet surfaces.
Reinstalling Cabinet Doors and Hardware
Reinstallation of cabinet doors and hardware should be done with precision to maintain the new look. Start by aligning doors carefully to avoid gaps and misalignment.
- Hinges: Ensure that hinges are clean and free of paint to prevent sticking. Reattach them tightly for consistent door function.
- Handles and Knobs: Choose hardware that complements the new color scheme. Securely fasten hardware to avoid loosening over time.
Using a level can help achieve even spacing and alignment, enhancing the overall appearance.
Long-Term Care and Maintenance Tips
Maintaining painted cabinets is straightforward with proper care routines. Regular cleaning is key to preserving the finish.
- Cleaning Solution: Use a mild soap and water solution with a soft cloth. Avoid harsh chemicals that can damage the paint.
- Avoid Excess Moisture: Wipe up spills immediately to prevent water damage. Use coasters under items to minimize scratches.
- Inspect Regularly: Check for any signs of wear or damage. Address nicks or chips promptly with touch-up paint to maintain a fresh look.
Establishing these habits ensures that kitchen cabinets remain vibrant and functional for years.